Recipes | Spring Quarterly 2021
Natural Egg Dye Guide
Dying eggs is a fun spring activity to do with children and friends (or on your own!). While many people are familiar with store-bought kits, creating your own egg dyes is a fun project in itself! Natural dyes are a simple and chemical-free alternative to most store-bought dyes. Best of all, they can be made with foods and spices you may already have stocked in your kitchen!
Ingredients/tools needed:
• Dye Materials
• Shredded or chopped produce – 2 to 3 cups
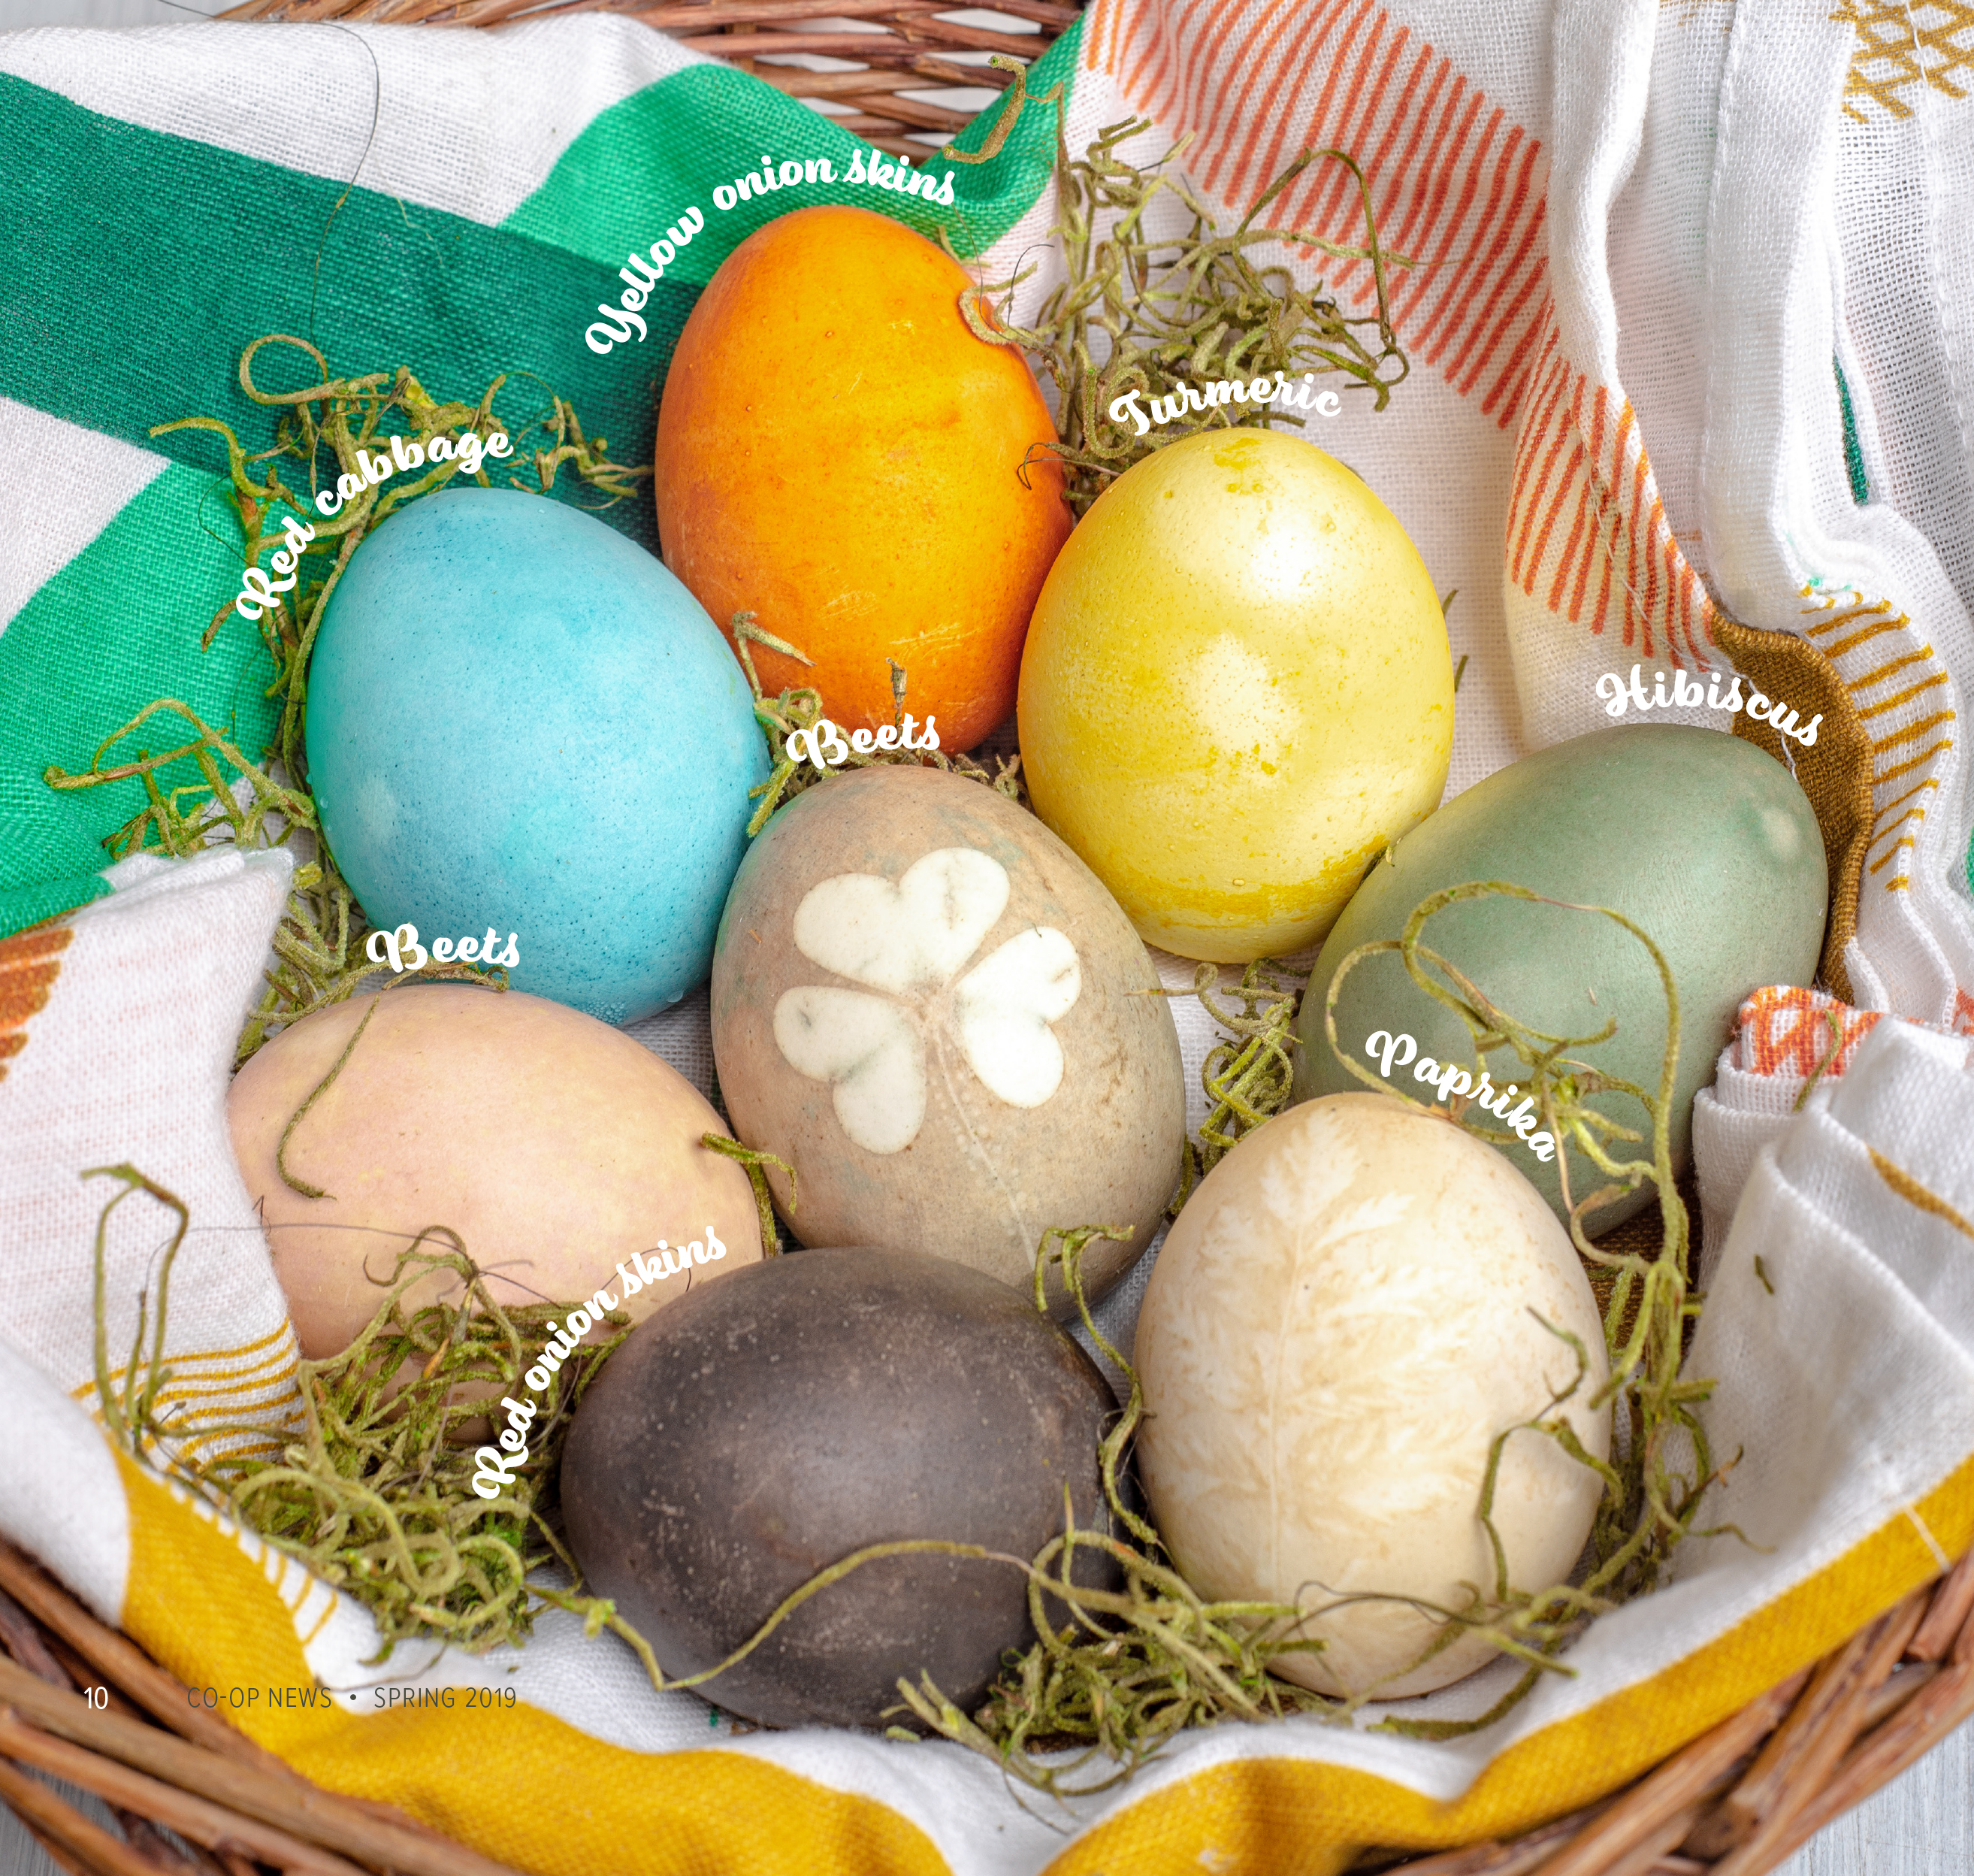
- Red beets (pale pink)
- Yellow onion skins (orange)
- Red onion skins (deep brown)
- Red cabbage (blue)
- Or try avocado skins (pink), carrot tops (yellow), or blueberries (blue-grey)
• Tea bags – 6 tea bags
- Hibiscus (jade green)
- Or try chamomile or Red Zinger tea (various shades)
• Spices – 2 TBSP
- Turmeric (yellow)
- Paprika (ecru)
• 2 cups water
• 1 Tablespoon vinegar per cup of dye color
• Pots for simmering ingredients and boiling eggs
• Mesh strainer
• Small bowls or mason jars
• White eggs
• Coconut or olive oil (optional – for adding luster to eggs)
• Optional – for natural plant pattern
- Small leaves or flowers
- 2-3” section of panty hose or 4” cheese cloth
- Small rubber band
Directions for boiling eggs:
- Add eggs to a medium pot and cover with cold water. Bring pot to a boil. Once it’s rolling turn off the heat and cover the pot. After 10 minutes, place eggs in a bowl of cold water and let sit until they’re cool to the touch.
- Drain bowl and replace with warm, soapy water. Gently rub eggs with a washcloth or your thumb to remove oils that prohibit natural dyes from adhering as effectively to the egg shell.
Directions for making natural egg dye:
- Bring dye materials and water to a boil. Turn heat down to low and simmer, covered, for 15-30 minutes until desired color is reached. Keep in mind that the eggs will be several shades lighter so it’s best to go for deep, rich hues.
- Remove liquid from heat and let cool to room temperature.
- Pour dye through a mesh strainer into bowls or mason jars and add 1 Tablespoon of vinegar for each cup of dye liquid.
- Lower hardboiled eggs into dye and place in fridge until desired color is reached. Let sit overnight for best results.
- When the eggs are ready, scoop them out with a spoon and gently rinse. Once rinsed, place on a drying rack or an upside-down egg carton.
- Naturally-dyed eggs have a matte finish. If you’d like to add a little luster, rub with a drop or two of coconut or olive oil.
Creating a natural plant pattern:
Before adding eggs to your dye, take a small leaf or flower and lay it flat to your egg. Take your panty hose or cheese cloth and wrap it firmly around your egg and leaf. Secure with rubber band around the excess cloth on the back side of the egg. Once secured, lower egg into dye.
Tips
• If you want more vibrant eggs try another round of dye. After your first round of egg dying, let your eggs dry and add to the dye again for a more vivid shade!
• For the advanced egg dyer – try dipping in two different colors for unique hues! After your first round of egg dying, let your eggs dry and add to a different dye again for a more vivid shade!
We tested out six different natural dyes, with beautiful results. The dye takes to each egg differently, so even within the same jar of dye, you will get different results. We also taste tested each egg (Yum!) and none of the natural flavors of the dyes carried over to the eggs.